Here’s an easy bath bomb recipe for children. Follow the method below and find out how we have adapted the recipe to make it simpler for children to do. These bath bombs are rainbow coloured too! We also explain the science behind why bath bombs fizz. You can buy our Bath Bomb Kits too!
Following our busy Rainbow Bath Bombs workshops in Devon, I wanted to share with you the *new* recipe we were using because it is slightly different from many recipes out there. The main ingredients in bath bombs are powder based (more below) and you need to add a liquid, often water, to bind these powders together to make them into a bath bomb. However you need to add just the right amount of the water to ensure the powders stick together but do not start reacting – this was the tricky bit for children previously, but our new recipe works well.
Either grab your own materials, or buy our kits here and they come with the ingredients you need.
Materials
- 4 cups
- Stirring sticks/spoons
- Sodium bicarbonate (baking soda)
- Citric acid (powder or granules)
- Mineral salts or Epsom salts
- Red, yellow & blue food or cosmetic colouring
- Essential oil (to add scent) – your own choice
- Oil – any kind will do, olive oil, coconut oil, almond oil, sunflower oil.
- Pipettes for measuring the oil
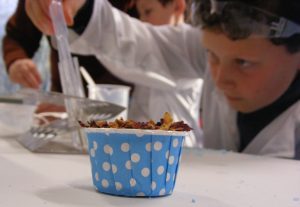
- Mould or other small container to hold the bath bomb whilst it dries (we use paper ramekins)
You can buy our kits here and they come with the ingredients you need.
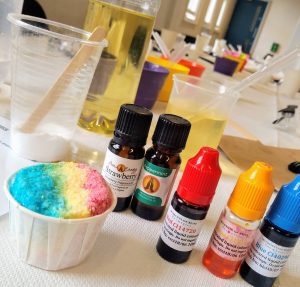
Some of the ingredients for the rainbow bath bombs
Method
1) Put the following ingredients into one of the cups and mix them together.
3 heaped dessertspoons of sodium bicarbonate
2 heaped dessertspoons of citric acid
1 heaped dessertspoon of mineral salt
2) Next, add 2ml of oil, and mix it in really, really well. Add more oil, 1ml at a time until the powders clump together and resemble damp sand.
…Now, make this powdered mixture into rainbow colours…
3) Separate the mixture equally between 3 cups.
4) Add 2 drops of red colouring to cup 1 – notice the fizzing? Stir quickly to stop the fizz and to blend the red in.
5) Repeat with the yellow and blue colouring, taking care not to add so much colouring that you can not stop the fizzing reaction (disaster!)
* You now have 3 coloured bath bomb mixtures * Horrah!
…Next, prepare the bath bomb for drying….
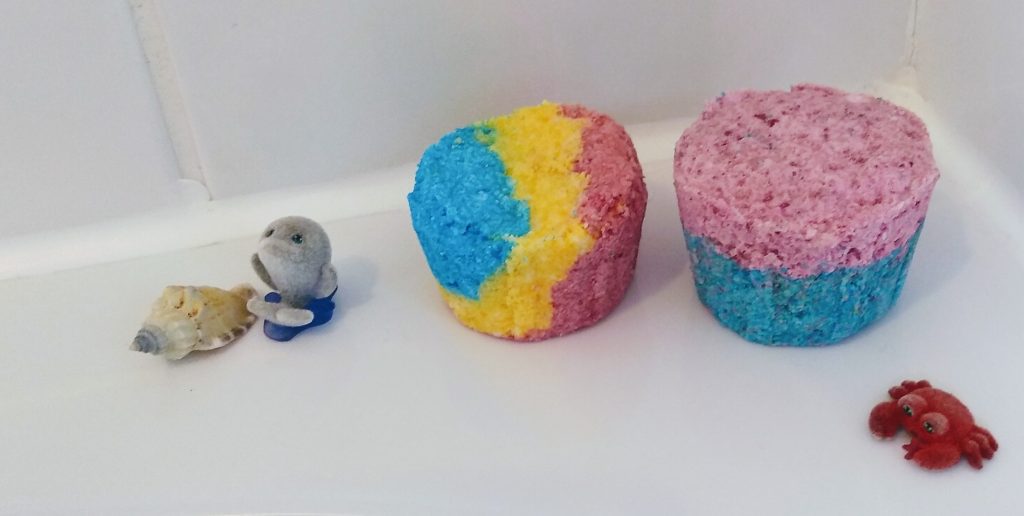
6) Scoop out the red and put it into the mould/pot and push it down with you fingers until it is squashed into the bottom of the pot. Add the yellow on top, squish it down, then add the blue last, and press this down too. The colours should blend together a little to make orange and green layers thus creating a rainbow effect.
You could try and make the colour stripes vertical, or mix them altogether to create a different effect….its up to you!
7) Allow to dry for at least 2 days until it is rock hard.
8) Put it into an airtight bag for storage or use it straight away. When you fancy a relaxing bath, drop your bomb into the bath and watch it bubble and fizz.
Lab notes
Water!
Notice we didn’t add any water to bind the powders…this is what children find tricky to get perfectly right. If you add too much water the powders will start reacting and you can’t stop it! Oil is more forgiving, it doesn’t start the reaction easily like water, but it will if you add too much.
Dry/crumbly bath bombs?
If, after the bath bomb has dried, it is crumbly, this means you did not add enough oil to bind to ingredients together. Remember it is supposed to resemble damp sand (the kind of sand that is good for making sandcastles) before you press it into the mould.
Other ingredients.
There are loads of other ingredients you can add, petals, biodegradable glitter, even corn flour (which make them lighter). They all have their place, but the recipe above is designed to be simple for children to follow. Just use 1 colour if you prefer, but the rainbow effect is just soooo pretty! Experiment!
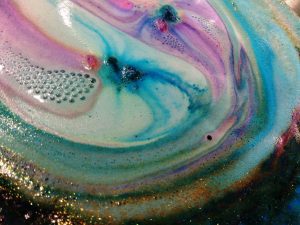
Try different colours & biodegradable glitters
Moulds.
There are numerous mould designs on the market, these can be quite pricey. We use paper ramekins as we make a lot of bath bombs with kids and they take their bath bomb home in their moulds. For making bath bombs at home, any small mould will do, no need to spend a fortune, although you will want to consider that you’ll need to get the bath bomb out easily when it has dried.
The science bit!
There are different recipes for bath bombs but the 2 key ingredients which create the “fizz” are citric acid & sodium bicarbonate. When dry they do not react, but in water they create a bubbly chemical reaction. Here’s how:
Sodium Bicarbonate (NaHCO3) and when it dissolves in water positively charged sodium (Na+) breaks away from negatively charged bicarbonate (HCO3-). In the same water, the citric acid (C6H8O7) also dissolves, with a single hydrogen ion (H+) separating from the rest of the molecule. This positively charged hydrogen and the negatively charged bicarbonate from the baking soda come together and quickly undergo a series of reactions, one product of which is carbon dioxide (CO2), the gas seen making bubbles in the water, creating that lovely fizz. The reaction also creates sodium citrate and water:
sodium bicarbonate + citric acid ——–> carbon dioxide + sodium citrate + water
Had as much fun as we did? Then feel free to share your pictures with us on Facebook.
Want more easy science?
If you try these activities at home you do so at your own risk.
So you liked this activity and want more ideas, right? Well head on over to our blog to find out other cool experiments such as Glowing Fluorescent Liquid or the Super Easy 6 – a free download with 6 super-easy experiments to try at home!
You can also check out the workshops we have coming up in Devon, why not book on?
Happy science-ing
Ruth
Chief Scientist